Solving AutoHotkey Problems in Windows 7

autohotkey There is plenty of love in the internet for AutoHotkey, the free macro application. It does allow a plethora of timesaving possibilities. I especially like it in situation where I am doing a repetitive series of keystrokes, but it also is great for text substitution (“btw” automatically becomes “by the way”) and for assigning macros to certain keys like Function keys, footpedals, etc.

I recently was attempting to send text messages from a dental software application called Dentrix. I was successful in getting data scraped from a spreadsheet and into a Google Voice message. However when trying to run repetitive tasks within Dentrix, AutoHotkey had absolutely no effect. I imagine there are other Windows applications that also render AutoHotkey impotent.

The problem is not with these applications. Rather it is with AutoHotkey, which is not specifically designed for Windows 7, even after that OS’ first birthday. The fix is simple, though. Just make AutoHotkey run in a Compatibility Mode. More specifically:

  1. Open Windows Explorer, and go to where your autohotkey.exe resides. (most likely in C:\Program Files\AutoHotkey)
  2. Right-click on autohotkey.exe, and click Properties
  3. Select the “Compatibility” tab
  4. Select the checkbox for “Run this program in compatibility mod for:”, and select “Windows Vista (Service Pack 2)” in the dropdown list.
  5. Select “Run this program as an administrator” checkbox, and select “OK”

This change will be reflected whenever any macros are launched. Good luck!

Publishing Panasonic HD Videos to YouTube

panasonic-sd9 Last year we bought a Panasonic HDC-SD9 high-def camcorder and have been extremely impressed with the camera in general. The picture quality, size, stability, and SD Card form factor have perfectly suited our needs. The major weakness is management of the video files. Panasonic includes some software with the camera, but it is useless for doing anything but putting videos onto a DVD, which defeats the purpose of recording in HD. They also included some movie-making software, but is extremely cumbersome, and still did not manage high-def videos in Windows XP or Vista.

Thankfully there is Windows 7. Panasonic and Sony selected the AVCHD format for their videos, but previous versions of Windows were not able to manage this codec. Not only does Windows 7 include native support for AVCHD, but the new Windows Movie Maker, a free download from Windows Live, can easily publish these files to YouTube.

In order to publish one of the SD9’s videos to YouTube, one must first move the video files onto the computer’s hard disk drive. Insert the SD card into the card reader, and navigate to that drive using Windows Explorer and look for the folder: X:\PRIVATE\AVCHD\BDMV\STREAM  (where "”X” is the drive letter for the SD card). Each scene recorded by the camera will appear as a .m2ts file. (These files include the video and the audio, by the way.). Select all of the .m2ts files, and move them to a temporary folder location you’ve created on your hard drive. (I set up \Users\Public\Videos\UnprocessedVideos as mine, and put a link to it in the SendTo list).

moviemaker

Next, open Windows Live Movie Maker and drag all of the .m2ts files of interest into the workspace in the right half of the screen. Drag the scenes around to put them in order. Then, for each scene that begins with a transition, put the cursor at the beginning of the scene and select a transition (by going to Animations and selecting a transition.)

To publish the video, click on the Home tab, and select the YouTube logo in the Sharing section of the ribbon. You’ll have to enter your YouTube account name and password for each upload. After a few minutes you will be notified of the publishing success with the option to view the video in YouTube. It will take YouTube a few minutes to complete its transcode, and the job will be done.

Moving MasterCook Recipes to Evernote

mastercook 
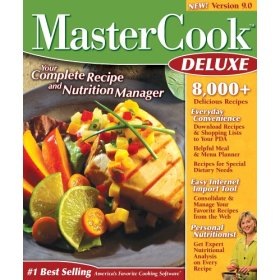
From the days of MealMaster and Prodigy, my family and I have been big fans of computer cookbooks. The ability to store an infinite number of recipes in an easily searchable, confined spot has been a joy in the kitchen. Several years ago Sierra bought MasterCook and looked like they were going to make great strides with their excellent program. It was far ahead of its time, being a database where items (in this case, recipes) could be tagged with multiple categories. I longed for a flexible database that would allow me to tag entries that had nothing to do with food and it’s here: Evernote.

With Evernote one can place little written notes, copied web material, scanned notes, or photos into a database, and tag them for easy retrieval. The search is fantastic, and the database is backed up online so it can be accessed from any place with web access. There is an overview video that demonstrates the concept, though the narrator is barely intelligible at certain moments.

Evernote I decided to move a cookbook of about 500 family recipes over to Evernote, and it went fairly smoothly. Using the instructions below, one should be able to smoothly transport a MasterCook recipe database over to Evernote.

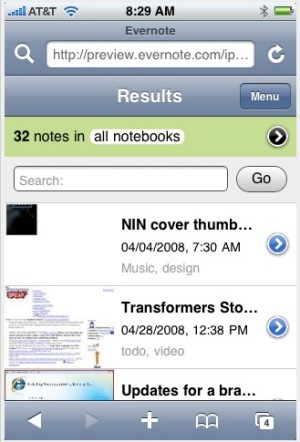
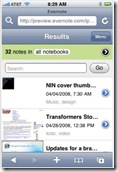
Evernote offers a few advantages over MasterCook. The ability to access recipes from anywhere on the web is very enticing, especially if one has mobile web access with a device like an iPhone, Blackberry, Treo, or other large format phone. The second huge advantage is retrieval. Evernote’s search finds matches as you type, so inputting a word like “chocolate” will show every recipe containing chocolate. Keep typing “chip” and the search results narrow to something fairly browsable. Compared to MasterCook’s convoluted search page, Evernote is as easier to use than Google!.

evernote_iphoneEvernote also allows tagging, so all of the recipes can have category tags. Tag certain recipes as “Favorite”, “ToTry”, and “Standby” and you have a very powerful database (MasterCook also could handle this, but Evernote is easier to work with). The final, major feature that I haven’t taken advantage of is the easy capture of recipes online. I foresee finding this month’s Bon Appetit recipes, selecting them and placing them into Evernote where I’ll tag them as ToTry, all in about 5 minutes. No clunky folders or mistorn magazine pages! Another huge advantage to Evernote is that it is free.

Mastercook has features that Evernote cannot handle. The two I will miss are recipe scaling and the pretty format printer output. To make those cookies for the entire church will require a little bit of calculating for ingredients. There are plenty of features I won’t miss, though, such as nutritional information, awkward entry of ingredients (like “Watermelon, cubed in 3/4″ by 1” chunks), and instructional videos. I just didn’t use these features.

To get a MasterCook cookbook into Evernote, we’ll basically export the recipes from MasterCook into one big document. We’ll open that big document in Microsoft Word, manipulate it to strip unnecessary formatting, then save the recipes as individual .txt files. Once the recipes are in their own .txt files, we’ll drag them into Evernote and be done!

Here are the detailed instructions:

  • Create a temporary folder to place outputted recipes. I prefer to place a folder called “Import” on my Windows Desktop.
  • Open MasterCook and select all files to be exported from the recipe browser
  • Export as a “text file”. Deselect “Break Up Lines When Exporting Text”, and be sure to click “Export As A Single File” (when MC exports to multiple files, it puts wasteful text at the beginning which will cause the recipes to not have titles in the Evernote Table of Contents).
  • Open the output file in Word.
  • Open Find/Replace (Ctrl-h) and Find this exact phrase (copy and paste it):   ^w^p* Exported from MasterCook *^p^p^w
    Replace with: ^m
    (This step will put the recipe titles on line 1 of each page by removing unnecessary spaces, line breaks, the MasterCook’s “Exported…” message)
  • Make sure each recipe fits on a single page. Change your page size, margins, and text size to keep recipes from automatically spilling to subsequent pages (I like to set the page length at 22″ and the font size at 5, just to be sure. Ignore the fix margins message that may pop up)
  • Create a new macro that will save each page as a separate document:
    • Tools, Macro, Macros…
    • In the top white box of the pop-up window, type “BreakOnPage”.
    • Hit “Create”
    • Replace the text in the window with:

Sub BreakOnPage()
   ' Used to set criteria for moving through the document by page.
   Application.Browser.Target = wdBrowsePage

   For i = 1 To ActiveDocument.BuiltInDocumentProperties("Number of Pages")

      'Select and copy the text to the clipboard.
      ActiveDocument.Bookmarks("\page").Range.Copy

      ' Open new document to paste the content of the clipboard into.
      Documents.Add
      Selection.Paste
' Removes the break that is copied at the end of the page, if any.
      Selection.TypeBackspace
      ChangeFileOpenDirectory "C:\"
      DocNum = DocNum + 1
      ActiveDocument.SaveAs FileName:="test_" & DocNum & ".txt", FileFormat:=wdFormatText
      ActiveDocument.Close

      ' Move the selection to the next page in the document.
      Application.Browser.Next
   Next i
   ActiveDocument.Close savechanges:=wdDoNotSaveChanges
End Sub
  • In the copied text from above, replace the c:\ portion of the ChangeFileOpenDirectory line with the exact location of the folder created in Step 1. (If this is confusing, open the import folder created in step 1 of this exercise in Windows Explorer. Click on the Address Bar to reveal the actual long name for the folder. Copy and paste this name between the parentheses in the ChangeFileOpenDirectory line above. This line will tell the macro where to save all of these recipes, so we want to to show the location created in step one)
  • Save the Macro, and close the Visual Basic window
  • Hit Ctrl-Home to put the active, blinking cursor at the beginning of the document.
  • Select Tools, Macros…
  • Select BreakOnPage in the list and select “Run”. This will save each page to its own file in the Import folder created in step one.
  • Open Evernote and the Import folder side-by-side
  • Drag outputted txt files into Evernote.

Once the recipes are in Evernote, you’ll want to take some time tagging them. Evernote will not read MasterCook’s tags, but thankfully one can search for the tag names, then tag all of the recipes in the search result quickly. This will greatly speed things up versus tagging each recipe in Evernotes tape stream.

Evernote can handle a tag hierarchy, too! Instead of having names of ethnicities, food categories, and source names scattered throughout your tag list, simply create a few tags called: Ethnicity, Meats, Desserts, Source, etc,. Then, create new tags for each ethnicity (Mexican, Chinese, Indian, etc), meat type (chicken, lamb, beef, etc), dessert category (pies, cakes, ice cream, etc), source (Bon Appetit, Emeril, etc). All of these tags will appear initially as main-level tags in Evernote’s left margin. Now drag tags like “Chicken”, “Lamb”, and “Beef” to the “Meats” tag, and they will become sub-tags of Meats. This is an excellent way to organize your tags so you can browse them later!

Good luck and happy cooking!

Overcoming Vista SP1 Realtek Sound Problems

Last week I upgraded Vista to SP1, but found a new problem after the upgrade: no sound. My speaker in the tray had a red “X” through it, but the drivers didn’t seem to have any problems. When I tried to automatically upgrade the sound driver, it told me that I had the most up-to-date driver available. When I went to the Control Panel’s “Sound” applet I was able to select sounds, and had the option of clicking the green play button, something that isn’t available when the driver is wrong.

I’m just using the on-board sound that came with my motherboard. I have an Intel DG33BU, and the Intel site offers no help on the situation. Hopefully the Googlebot will pick this up and help others with Intel SP1 Realtek sound problems.

I was able to get the sound working by disabling the front panel jack detection. The way you do it isn’t intuitive:

    realtek.jpg

  • Open Vista’s Control Panel (Window | Control Panel)
  • Open the Realtek Audio Manager (not “Sound”)
  • In the navigation bar in the far right, there is a little yellow folder icon. It is just below “Device advanced settings” and above “ANALOG”. Click the folder icon.
  • Click “Disable front panel jack detection” so that a yellow check mark shows up. Hit “OK”, and close the Realtek HD Audio Manager. That should re-enable the sound.


Make Firefox A Snap: Part III

"Say, how did you get that active tab to be so pretty?"

firefox_tabbar

I agree. It looks great; almost velvety. This, like the changes in Part I, is a UserChrome.css tweak. Simply put this text into your UserChrome.css file:

.tabbrowser-tab[selected=”true”] > hbox,
.tabbrowser-tab[selected=”true”] > .tab-close-button {
background-color: #000033 !important;
color: #fff !important;
}
.tabbrowser-tab[selected=”true”]:hover > hbox,
.tabbrowser-tab[selected=”true”]:hover > .tab-close-button {
background-color: #000099 !important;
color: #fff !important;
}

[source]

Notes:

  • Be sure that the four instances of "true" are surrounded by quotation marks. The source site has this mistakenly posted with two apostrophes.
  • Pick your own colors. The 00033 color creates a dark blue, but any hexidecimal color can be used. (the second half sets up the color used when hovering over the tab)
  • Your UserChrome.css file can be found by clicking Start | Run, then
    "%appdata%" and press "Enter". (In Vista, simply hit the Windows button and type the phrase). Drill down through these folders: Mozilla | Firefox | Profiles | crazystringofletters | chrome. Double click UserChrome.css in the ..\chrome folder, copy, and paste the above text. You’ll need to close and reopen Firefox to see your changes.

Make Firefox A Snap: Part II

Now that we have the real estate cleaned up in our Firefox application, let’s really make this thing cook!

firefox_bkmrkbar

This is my Bookmarks Toolbar in Firefox and it allows me to hit several sites quickly.

Group 1

  • Gmail: I use Gmail and have it as a direct link from the bar. Any web-based mail client (like Yahoo Mail, HotMail, etc) can be bookmarked here, but I recommend putting it first in the bar since it is the most used. Simply go to your mail site and add the bookmark to the “Bookmarks” folder. It should automatically select the icon and will place text there. Hit OK. Now right click on the item in the toolbar and delete the text (Do I really need explanation of that great icon?)
  • Google Reader: In order to scan through about 50 different websites each day, one needs to be proficient at reading RSS feeds. More on that later, but since it is my second most used site, I put it second in the toolbar. No text needed since it has a unique icon.
  • Tiny: TinyURL is a great service for converting great big website addresses like: “http://maps.google.com/maps?q=raleigh+nc&ie=UTF-8&oe=utf-8&rls=org.mozilla:en-US:official&client=firefox-a&um=1&sa=N&tab=wl” down to just “http://tinyurl.com/2jxv45“. This is key for sending people links in emails that would normally wrap onto numerous lines, possibly rendering them useless. TinyURL simply databased my link and assigned it a preset in their system. With 36 characters per position, you can catalogue many entries without having to use more positions. These links actually go to TinyURL’s servers, though, so if their service is down (and I’ve never seen it go down), your link doesn’t work. Also, always be careful about clicking masked URLs. One could easily link a malicious site to an innocent looking tiny url entry.
    The TinyURL button I used is the company’s “button” from this page. Simply drag their link to your Bookmarks toolbar and edit the text to say “Tiny” instead of wasting space with URL. Now you can click that shortcut any time you want to quickly make a URL tiny. They actually have a Firefox extension for TinyURL, but I have found that piling on extensions can really slow performance down. This way works just as well..

Group 2

The second group of icons are folders of sites I use frequently. The first group, “D”, is daily sites I check. “W” is the group of sites I check weekly. In Firefox, you can hit any of these folders with the middle button and open all the links in tabs. I have eight sites in my “D” folder, and the Open In Tabs shortcut insures that I actually will check these 8 sites.

For more than one computer, though, things get complicated. I want my desktop and laptop computers to always keep the same population automatically. If I add a great site on my desktop Firefox, I don’t want to hassle with wondering later where I put it, so I have identical installations on each computer. There are Firefox extensions to handle this now, but I found a fantastic system that not only keeps my computers in sync, it also allows me to access them from someone else’s computer.

del.icio.us

While we are familiar with .com and .org sites, most don’t ever come across sites with the .us extension. This is one of them. Del.icio.us is a site now owned by Yahoo which allows one to store bookmarks on Yahoo’s server. In the old days if you saw a site you wanted to bookmark, could could copy the URL, login to your del.icio.us account, and post the link with subject-related tags. Better yet, these posts are public, so society’s popular links can be found easily through del.icio.us’ page.

I don’t deal with the social aspect of del.icio.us very much, but do use it as a razor sharp bookmarking tool. The key is that each search result in del.icio.us has an RSS feed*. When one clicks on a tag (listed on the right of the screen), del.icio.us returns a list of all of one’s bookmarks associated with that tag. Since the result has an RSS feed, one can use Firefox’s Live Bookmark feature to create dynamic bookmark folders! Simply copy the del.icio.us search result’s RSS feed to a new bookmark in Firefox, and Firefox will update the folder each time it launches.

firefox_bkmrkbar If you look at my toolbar again, you’ll see a “D” RSS feed. When I launch Firefox, it goes to del.icio.us to check which links I’ve tagged as “Daily” and lists them in my “D” feed. So, I have a quick, up-to-date folder for my Daily, Weekly, basketball, and blog-related links quickly accessible.

Adding links to del.icio.us is a snap with with the del.icio.us Firefox extension. Not only does it put a quick tag icon on the toolbar, it also has a fantastic replacement for the bookmarks sidebar. If I click Ctrl-B, two panels open on the left side of the Firefox browser. The top one of the two displays all of my tags in del.icio.us along with a Search box. The bottom panel shows search results. The search entry box yields instant results below, so if I type “drill”, for example, I see two results in the search instantly: a link about picking a drill bit for a given screw size, and a link about basketball drills.

I’ve bookmarked 831 sites in the last 3 years and have command over all of them!

Next up: Highlighting that active tab so you can actually see it.

*RSS Feeds: News sites and blogs usually have a pattern like headline, story, headline, story…. If a website creator sets up the site with an RSS feed, one can use an RSS reader (like Google Reader) to quickly crawl out and grab these headlines and stories and put them into a consistent, easy to use application. It is almost exactly like USAToday’s and Wall Street Journal’s front page quick top news sections.

Make Firefox A Snap

firefox_window

I switched to using the Firefox browser several years ago, but it wasn’t until recently that I found myself getting through massive amounts of info with time to spare. I follow about 50 web pages a day and get around 100 emails and I finally have a system that tames all of this very quickly. The first installment of this series gets your Firefox viewing experience maximized.

There is a great article at Lifehacker.com about cleaning up the top of your Firefox window. I followed her advice and am stunned at how much more efficient this is. After getting used to this layout, it is hard to use IE7 without noticing how much valuable real estate is wasted.

I won’t duplicate Gina’s article, but it instructs one how to get rid of the navigation toolbar by getting rid of unnecessary icons like back, forward, and stop when you don’t need them. I was never a big user of the Bookmarks toolbar, but after seeing how she both created folders instead of true links and abbreviated the titles, one can see how efficient the bar can be.

In the next installment, I’ll explain how to really make the Bookmarks bar even more powerful than Gina’s.

Paste Multiple Lines into Google Maps

Firefox users can paste addresses in multiple lines into single line search boxes (like those in Google Maps). According to this article at Lifehacker.com, simply follow these steps:

  • Type "about:config" in the location bar.
  • In the Filter field, type "singleline"
  • Double click the editor.singleLine.pasteNewlines entry and change the value to "2"

A couple of other Firefox tricks I’ve adopted are two keyboard shortcuts:

  • Ctrl-L: Moves the cursor to the Address box ready to replace the current address.
  • Ctrl-K: Moves the cursor to the search box.